-
Showing posts with label Crafted with Style. Show all posts

Friday, May 6, 2016

Mother's Day Gift....

This is a beautiful and simple Mothers Day gift that was very much appreciated. Mama D recently moved into a little cottage, at baby sister's house near the River Ranch! Mom has been busy planting flowers and making things pretty! I thought this simplegift idea would be perfect by her back door!
 Simple and Quick Garden Idea: One large pot , 2 bags of sand, one tall post (treated for water rot & painted), two hooks and two hanging plants! And a few rocks on top to cover the sand! Easy Peasy... & Beautiful!!!!
Love how it turned out! You could easily add an address number too!
 I made the post look old with paint and stain!
 Lover her back door entrance......
 She loves it too!
 Simple to put together in minutes!
 LOVE IT!
 Happy Mother's Day Mama D from Ornery & NeeCee...Love you! Photo: Mama D on the right, Ornery on the left...Dad, brother Button, Sister aka "Mama Dawn" & Baby sis (below), Nanny!

Have a beautiful Mother's Day everyone! We are having a quiet BBQ at home! Love that idea!
 photo photo-12_zpsb1f5b574.jpg
Continue Reading ...

Thursday, April 9, 2015

"This Ain't My First Rodeo"...Ranch Style Bedroom ...

Love, Love Love how my guest room turned out...."This Ain't My Frist Rodeo" Bedroom...
I have been Collection items for this room a very long time....Finally, everything came together!

 I had fun mixing patterns & colors....old & new...personal family items from years past....
 This was fun...a frame from a family homestead, a skull from the ranch, my jewelry designed by me...love how this embellished skull turned out.
Love the reflections from the room in the free standing mirror.....
 My blinged-out Cow Horns on display...


I love my side tables, a little Cowgirl Shabby Chic!
Needless to say I'm walking on Sunshine....
"Love My Cowgirl Shabby Chic Bling Bling Thing" ...
look in the new room!

 photo photo-12_zpsb1f5b574.jpgXO.... Love, Like & share with Style!
Continue Reading ...

Saturday, July 19, 2014

Sweet Baby Doll Cradle with the Bedding

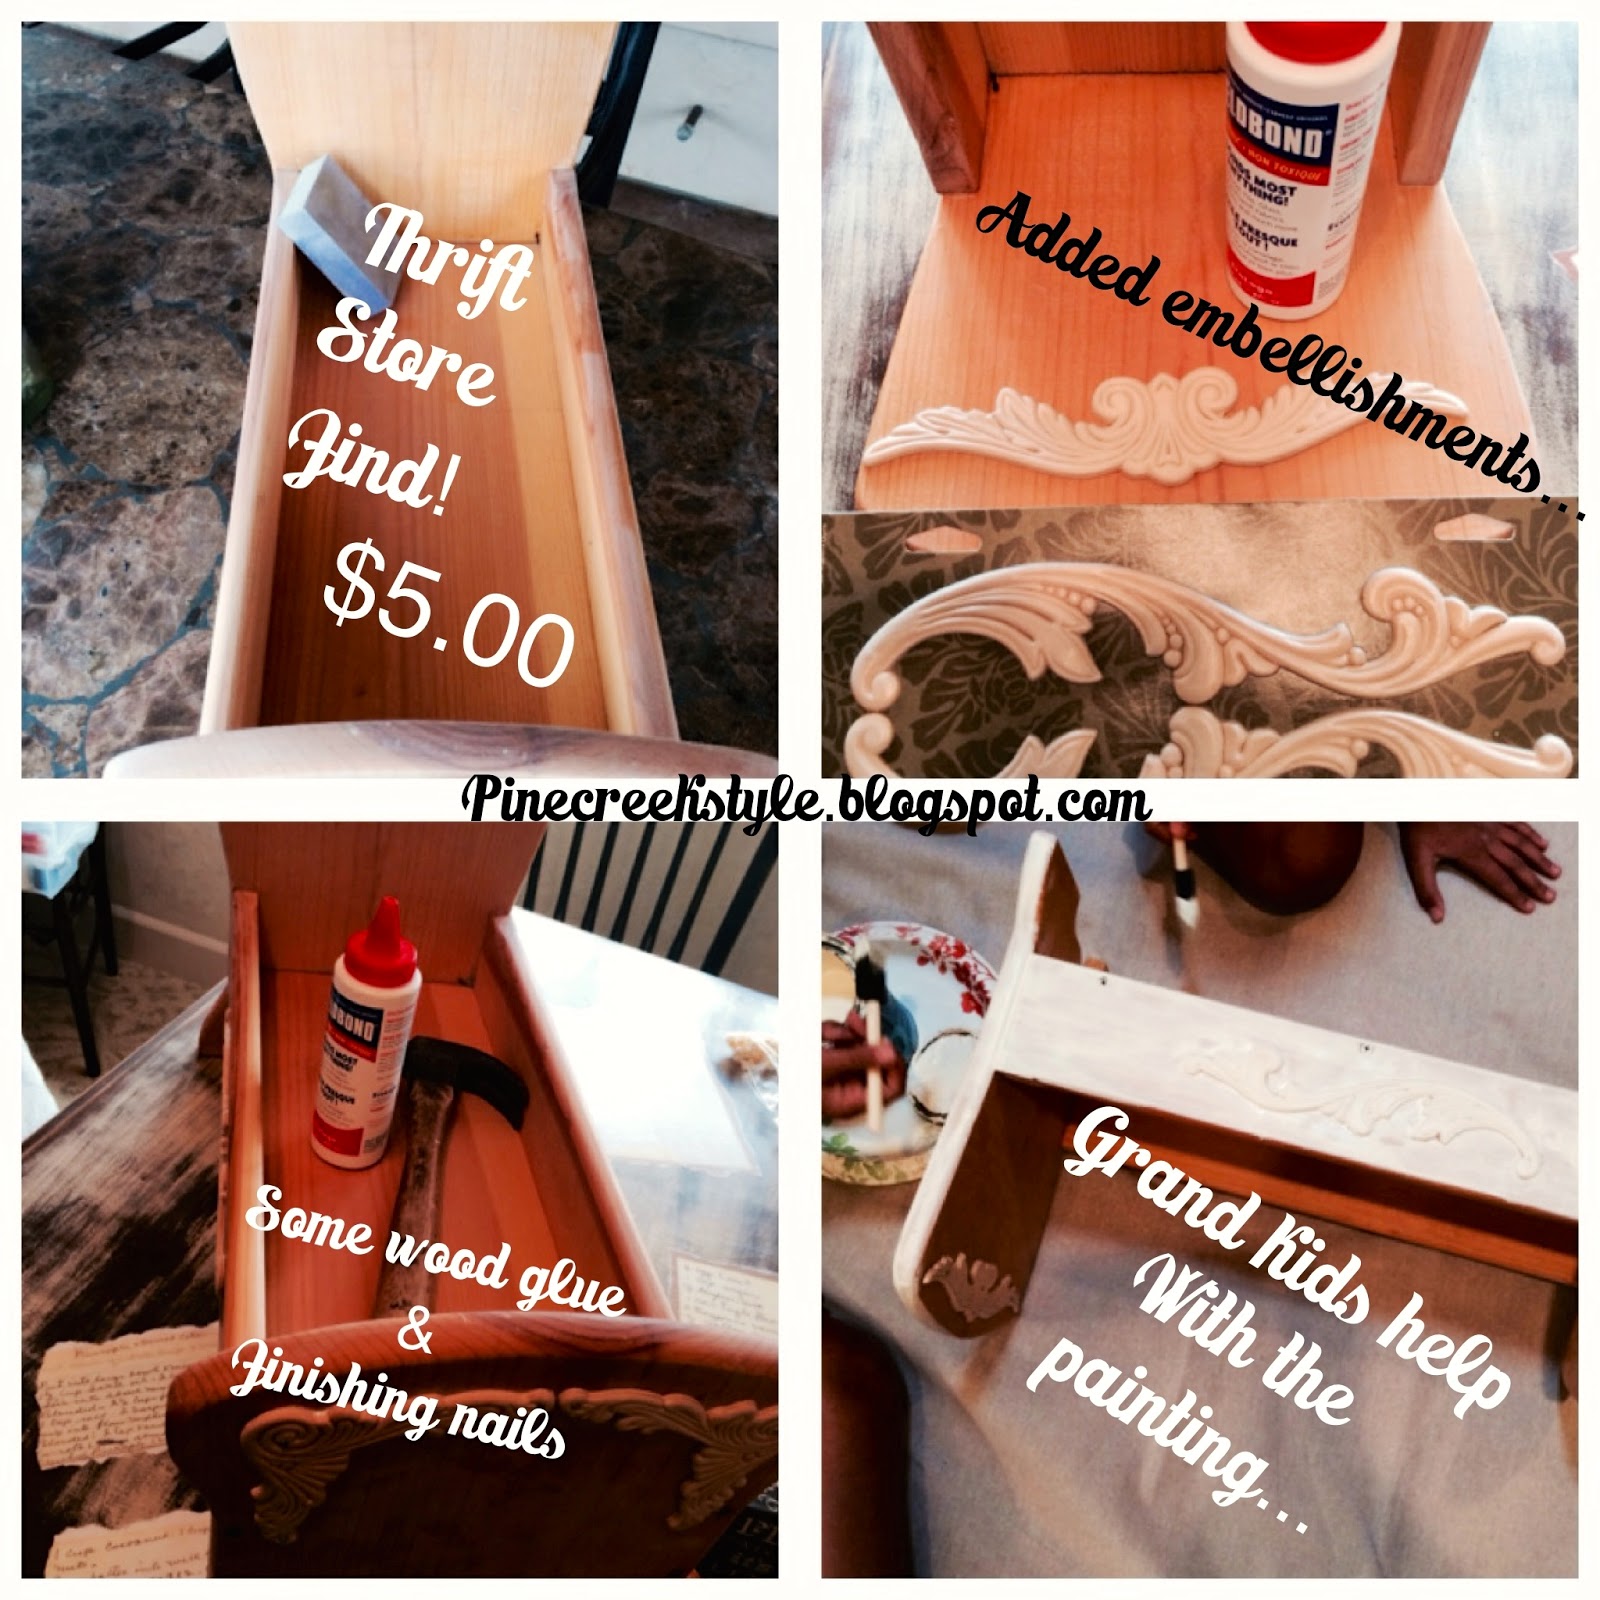
A sweet baby doll cradle caught my eye at a local thrift store. Solid, handmade & only $5.00! I bought her about a year ago. I waited till the right Baby Girl came along to play with her! Soon after, our niece announced she was having a girl! Perfect! I knew exactly how I wanted to finish this adorable project!
Adorable! I love how it all turned out!
 The two youngest Granddaughters came over for a slept over recently! We worked together for a couple of days completing the project while having fun! They loved helping. We sanded the cradle, added wood trim embellishments (found them at Home Depot). Then the girls painted the cradle & I stained & distressed it!
We made a mattress, pillow, sheet set and a comforter to fit the cradle. I measured the bottom of the cradle bed and used it as a guide for the bedding. Jess is decorating the baby's room in Pink & Brown Cowgirls! Adorable! Perfect for me, I had all of the fabric on hand! Imagine that! :)
 Oh My too Cute! Can't wait till Baby Girl is big enough to play with her Baby Doll Cradle.
I wanted to leave my mark and my love on the cradle....SOooo, I left baby girl a message from her Great Auntie & Uncle...This cradle is well built...I hope her daughter gets to play with it someday!
The girls & I had fun working together on the cradle. And, they loved seeing Jess LOVE the cradle too!
Sweet Baby Girl Wishes, May All Her Dreams Come True in Style...Precious & Priceless!
 photo photo-12_zpsb1f5b574.jpg
Continue Reading ...

Saturday, July 12, 2014

Baby Shower Gift Idea...

I love to give this gift! Who doesn't love the idea of seed money for a College Fund or a Savings Account?
 We do several different things with our change jar! This is one of them... Seed money for a College fund, to grow along with baby! Its is fun, simple & always appreciated! Our 2 youngest granddaughters were staying for a slept over. We had tons of fun working together on the shower gifts. We placed the coins in a baby bottle bank & tied with pretty ribbons & a tag!.
Fun, Quick & Fast....This cute gift is fun to put together & give!
For Baby with Style...
 photo photo-12_zpsb1f5b574.jpg
Continue Reading ...

Wednesday, October 2, 2013

Cute & Easy Halloween Witch...

A Crafty & Cute Witch for Halloween...
 "Adorable Witch..."
 Just a few items needed:
1 pool noodle
a sharp knife or scissors
black shoes
1 pair of striped knee high socks
 1 witch hat
And... about 10 minutes top!
Cut the pool noodle into four pieces: 2 short, 2 long,
 ( use the sock to measure, leaving a couple of inches of sock at the top), 
with a sharp knife or scissors
 Stuff the sock with the shorter piece first in the foot of the sock...
Follow by stuffing the leg of the sock with the longer piece
 Next...Place the shoe on the foot!
Use both witch legs and place the witches hat over the top for a table decoration!
 The pool noodles allow the witch legs stand up straight and solid....
 You can even position the legs to look like she's walking!
"I'm Melting...."
 OR...place the tops of the socks under a door and hang her hat on the door knob!
 She is TOO Cute! 
 You could place the witches hat on the floor next to the legs TOO!
Here she is standing at the top of my stairwell!
Simple as 1, 2, 3...
LIKE, SHARE & PIN today with Style...
Show-off Your Halloween Style Today...
NeeCee Signature
Continue Reading ...

Wednesday, June 26, 2013

Adding Embellishments to a Summer Dress...

A friend ask me about making a pair of earrings to match a new favorite summer dress. 
Of course I said YES!
But...YA know me...
There had to be some BLING!  NOT just earrings....
I had to add JUST a little bit more BLING to the ensemble!
I LOVE the results...AND so did she! 
 This is the Dress my friend bought!
Too cute! 
She wanted matching earrings. The yellow is more like a chartreuse yellow meaning a yellowish green. Hard to match!
 BUT, I found an easy solution. 
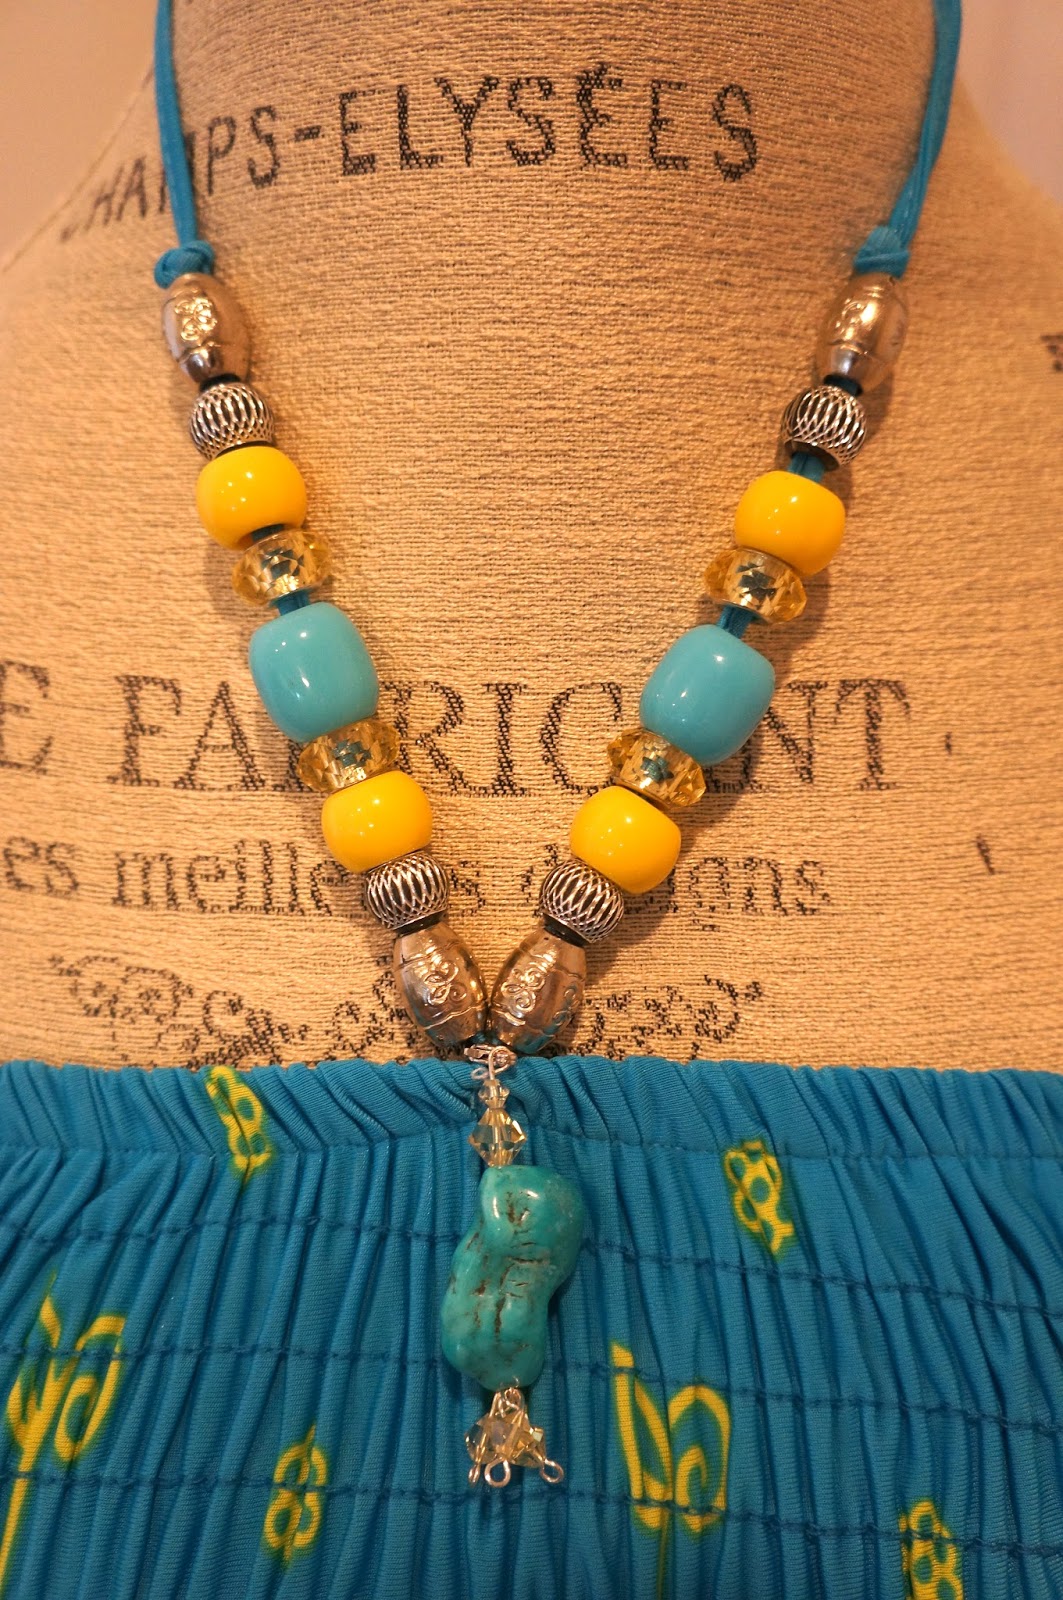
 This is a close up of the original neckline. I wanted to add crystal beads in a pale yellow to bling-up the neckline.
 I added pale yellow crystals on either side of the turquoise colored beads. Then I made a removable jewelry fob of Yellow Swarovski Crystals & Turquoise to hang on the "V" of the neckline. I used a necklace lobster claw for the jewelry fob and attached it to the base of the neckline.  
This made the neckline look like a necklace!
A simple embellishment made a beautiful difference!
 I then made a pair of earrings and a bracelet to match.
My Friend LOVED the enhanced neckline of the dress and... 
The jewelry to match!
 Enhanced & Embellished with  Style!
NeeCee Signature
Continue Reading ...

Monday, June 3, 2013

Pecking Order Pillows...

Finally found the fabric I've been looking for....
It was called; "Pecking Order"...
Yes, it's Roosters....It had to match MY kitchen!
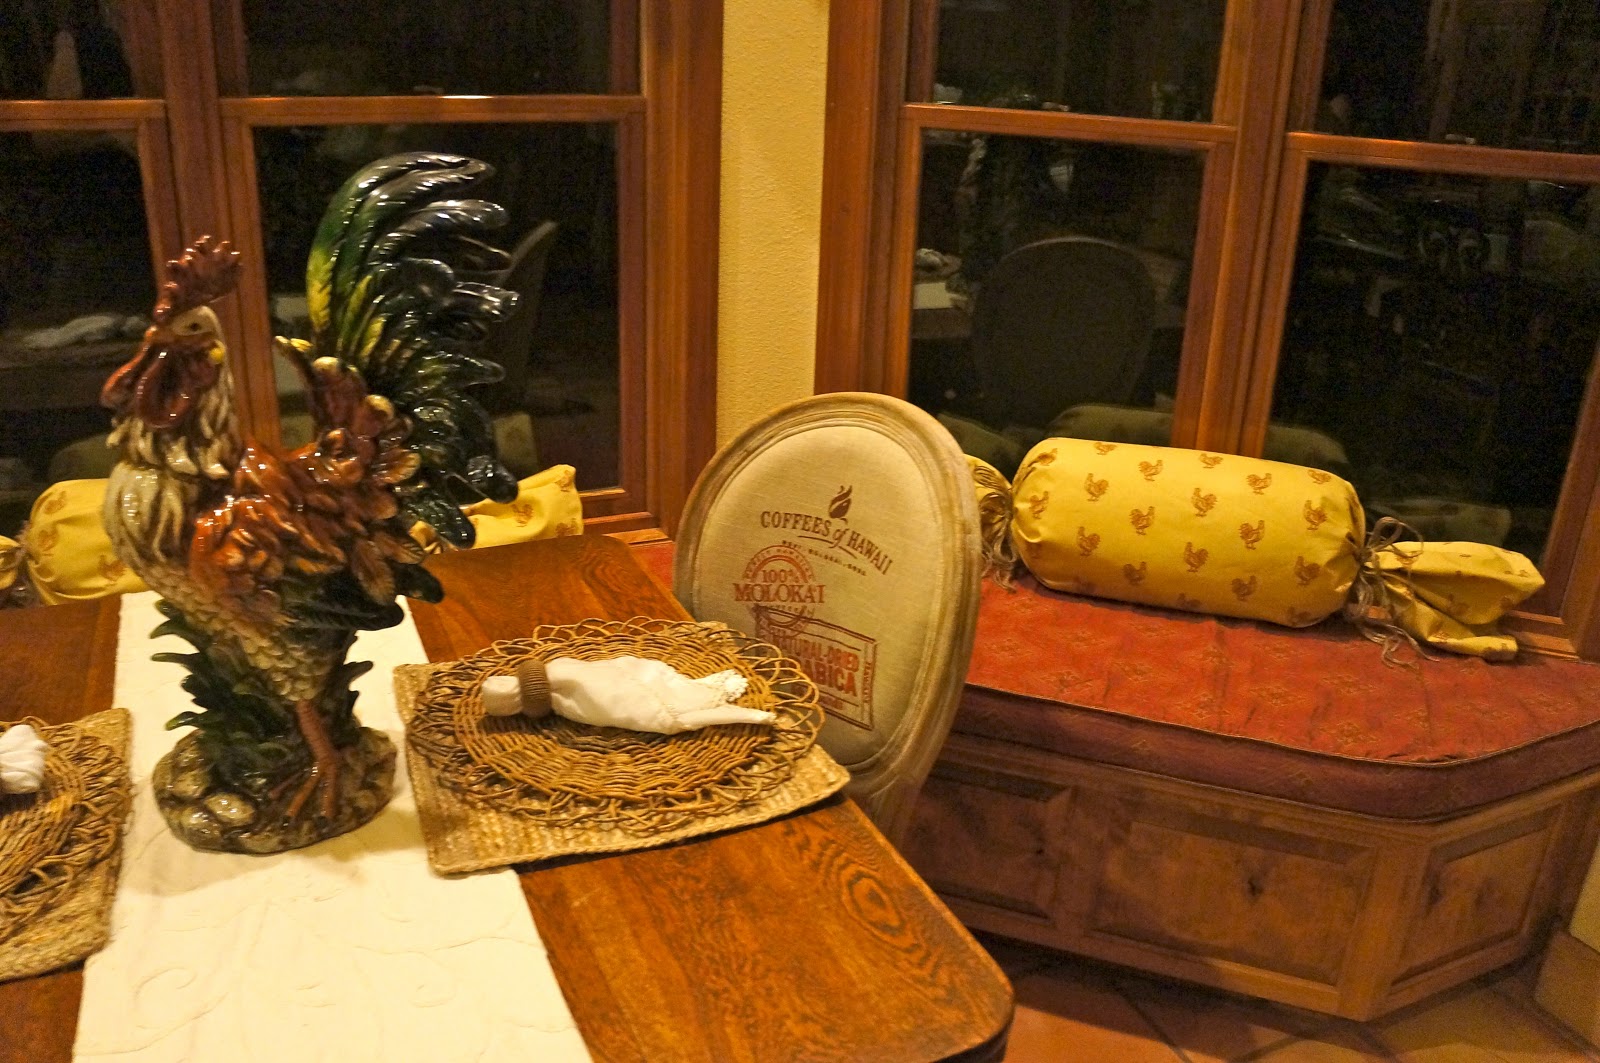
Recently I added a table to my window nook, transforming it into a Breakfast/Dining area...(see post here).
SOoo, I wanted to find or make pillows to match for the window seating area.
Found the fabric at Joanne's!!!
Just what I wanted!
Good things come to those who wait!
I had been searching for a while. A LONG while!
 This fabric needs to be dry cleaned. MMmm, sometimes a draw back! :S
BUT...the fabric was perfect in EVERY WAY...Color & Print!
SOOOooo, I bought it!
 AND...pulled out the Sewing Machine!
 Here is a close up of the fabric...just incase you get the notion to use the same fabric!
 I decided to cut the fabric into 1 yard pieces, 3 in all.
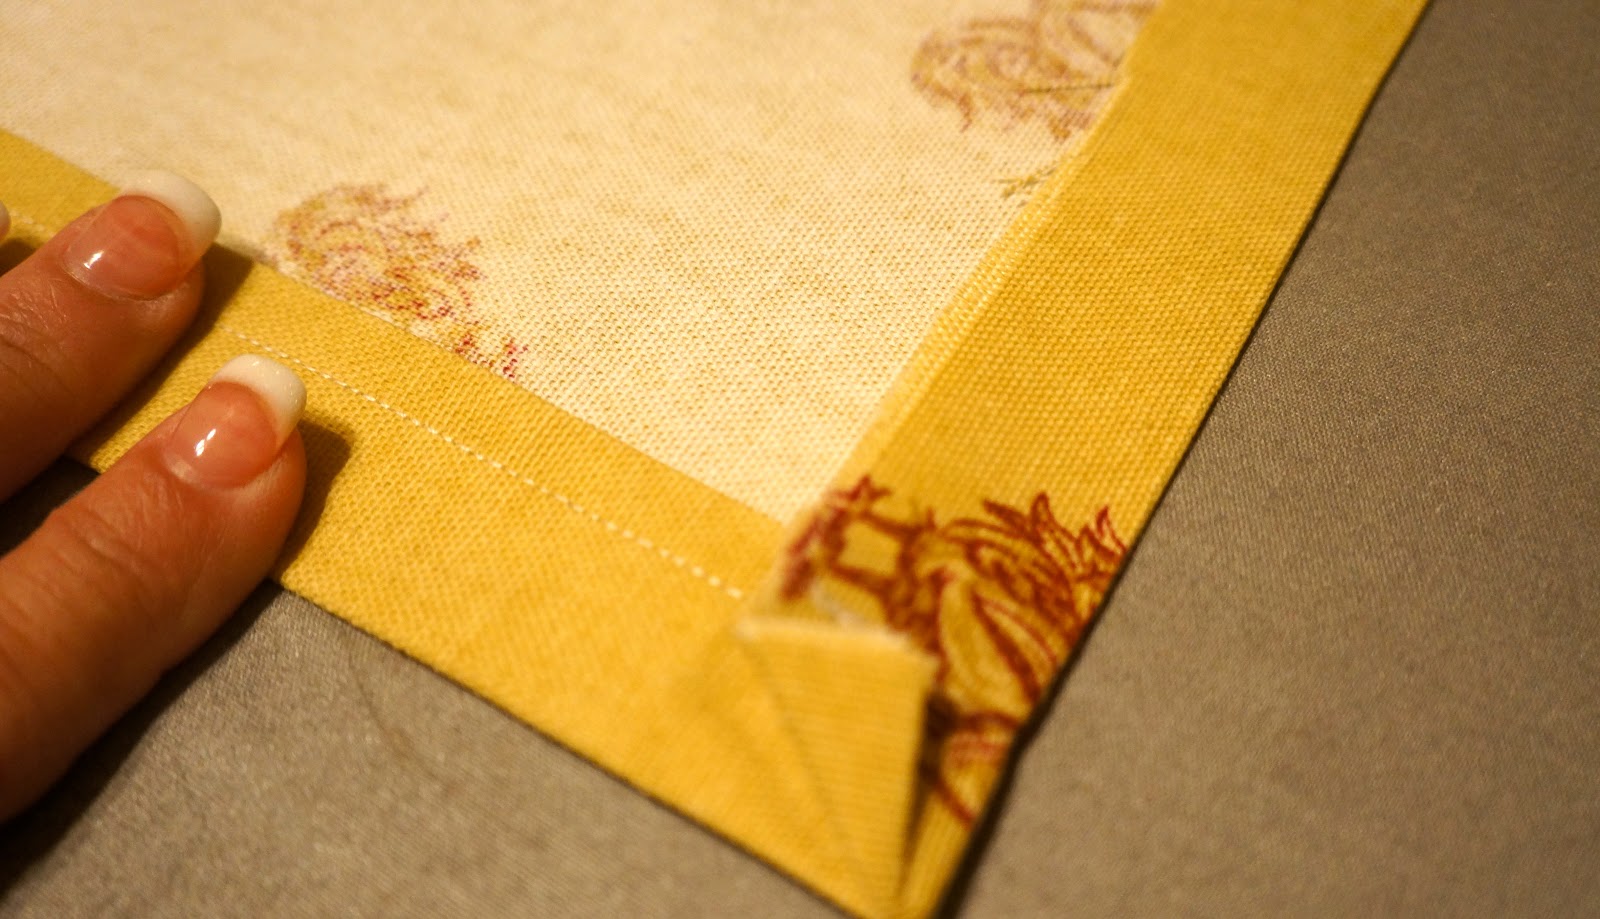
I turned the fabric's edges over 1", and ironed in place. 
Then I turned the fabric over again, another inch.  So NO raw edges were showing. I did this on two 2 sides, lengthwise!
 Then I sewed the two sides (lengthwise) using the sewing machine. 
 I repeated the above steps on the two remaining raw edges. 
This gave me a large finished piece of fabric.
*I made the pillows in this fashion so it will be easy to take the fabric to the dry cleaners. I won't have to pay a huge amount for dry cleaning. AND, it will be easy to place the bolster back into the fabric! :)
 I then place the finished fabric (wrong side up) on the table, and place the bolster pillow in the center....
 Then I rolled the fabric around the pillow, like a candy wrapper!
Tying both ends shut. I used twine for my ties, easy peasy!
 All you have to do is trim the twine to the length you want after tying!
*I used three pieces of twine for each end, I cut them the length of my arm, them trimmed after the bows were tied!
 The colors matched perfectly!
 I made 3 large bolster pillows in all...
The perfect finish for the nook!
I'm Crowing About My New Pillows with Style...

Continue Reading ...